
Topics covered in this article are…
- Introduction to Azure Key Vault
- Creating a .NET Core Web API Project
- Setup keys in Azure Portal
- Configuring Azure Key Vault Secrets Integration
- Keys: Azure Key Vault allows you to create and manage cryptographic keys used for encryption, decryption, and signing. These keys can be used to secure data at rest and in transit.
- Secrets: Secrets are sensitive values like connection strings, passwords, API keys, and other configuration details. Azure Key Vault provides a secure location to store and manage these secrets separately from your application code.
- Certificates: You can upload and manage X.509 certificates in Azure Key Vault, making it easier to secure communication between components of your applications.
- Centralized Management: Azure Key Vault provides a single place to securely manage all your cryptographic assets and secrets, reducing the risk of exposure.
- Security: Key Vault offers advanced security features like hardware security modules (HSMs) and strong access controls, ensuring that your sensitive information is well protected.
- Ease of Use: Integrating Azure Key Vault with your applications is straightforward. You can access secrets and keys programmatically or integrate them into your application’s configuration.
- Compliance: Azure Key Vault helps you meet regulatory and compliance requirements by providing auditable access and usage logs.
- Open Visual Studio.
- Click on “Create a new project.”
- In the “Create a new project” window:
- Search for “ASP.NET Core Web API.”
- Select the “ASP.NET Core Web API” template.
- Choose a location and provide a name for your project.
- Click “Create.”
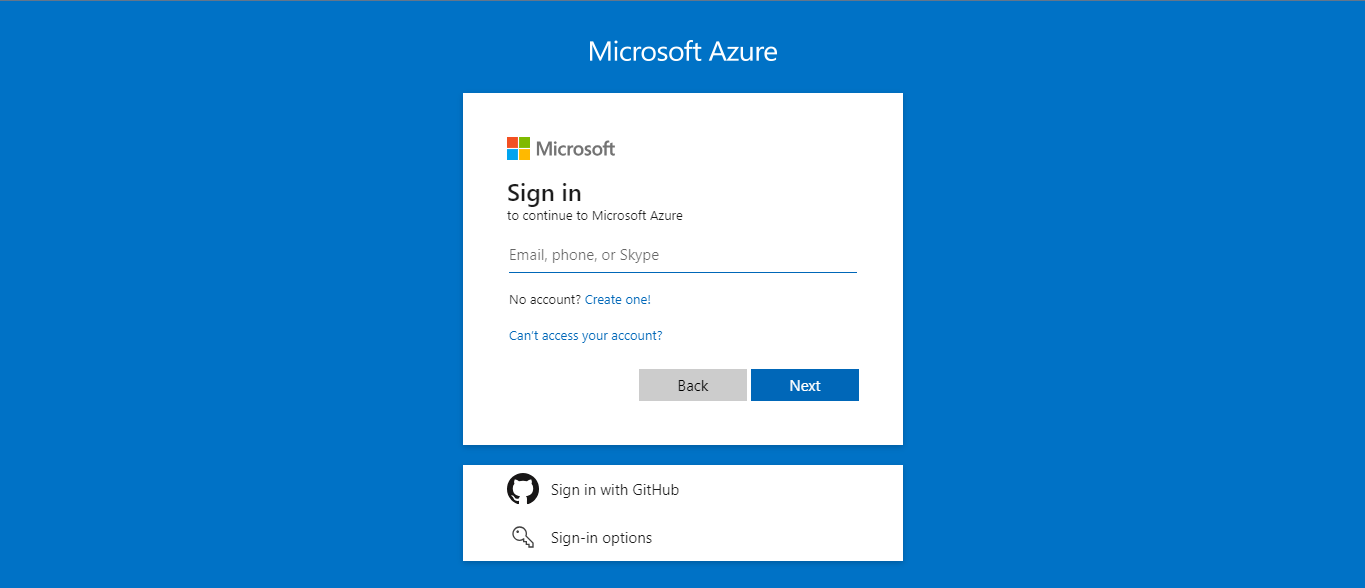
- Step 1: Start by going to the Azure portal and logging in with your credentials.
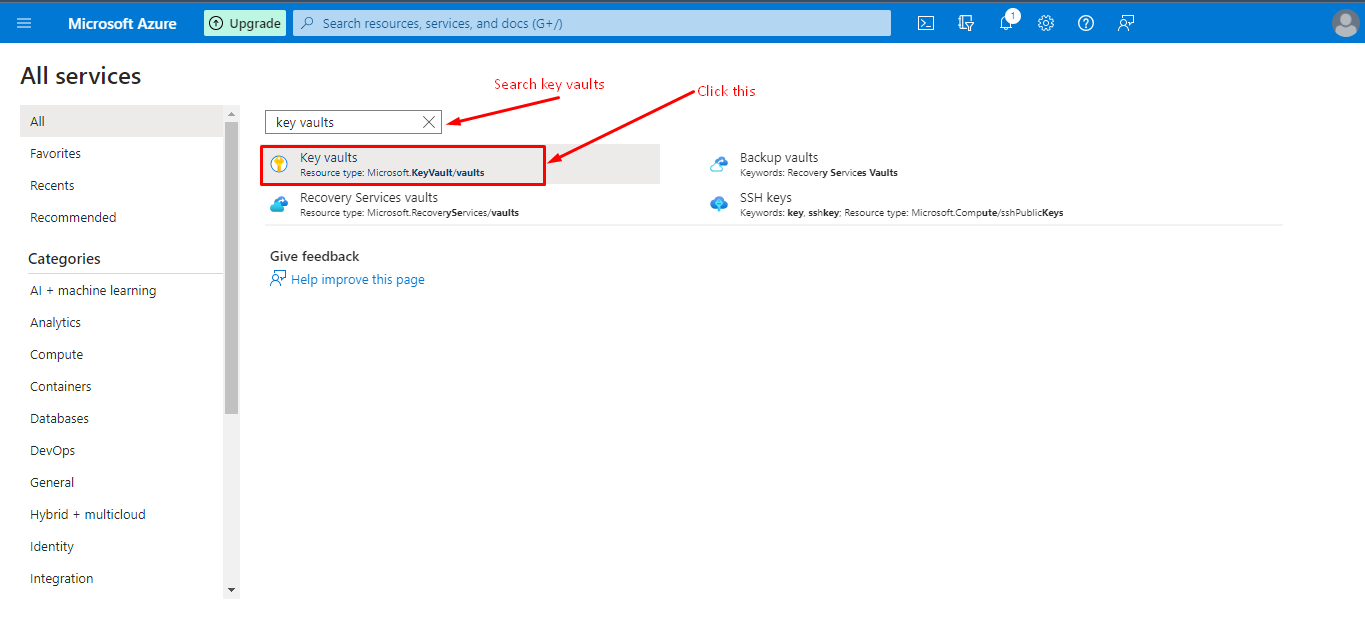
- Step 2: Once logged in, navigate to the “All Services” section in the portal’s sidebar. search “Key Vaults” in the search bar.
- Step 3: Proceed to acquire a subscription for Azure Key Vaults. (You can proceed with Azure free trial)
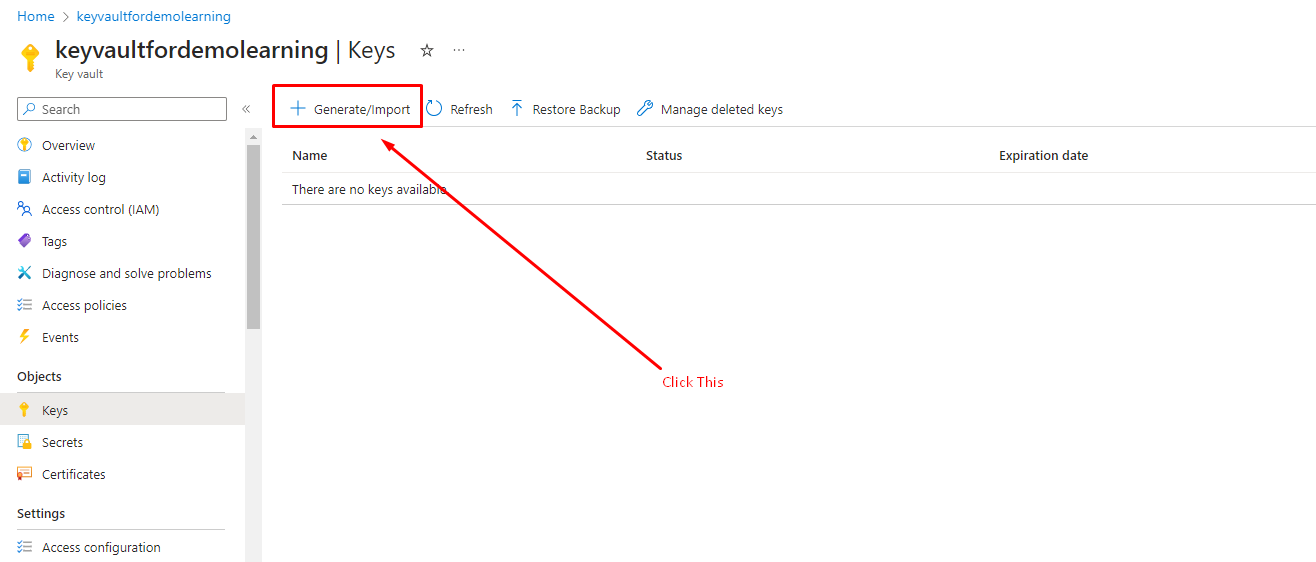
- Step 1: Within the previously created KeyVault, navigate to the “Keys” menu located in the sidebar..
- Step 2: Next, click on the “+” sign, labeled “Generate/Import,” to initiate the process of adding new Keys.
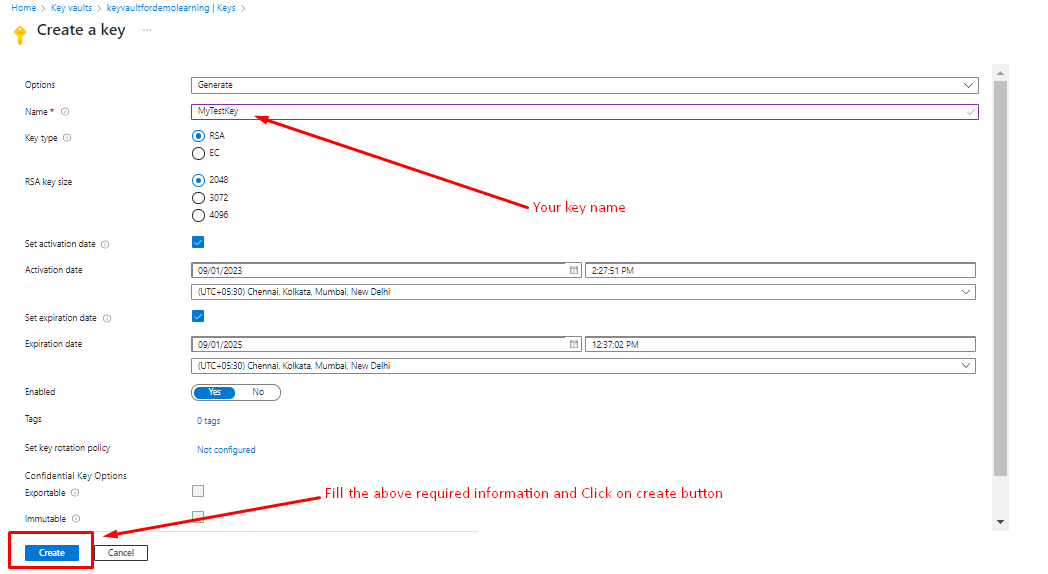
- Step 3: In the “Create a Key” section, Provide the following information:
- Name: Provide a unique name for the key.
- Key Type: Choose a key type (RSA or EC) and specify the key size or curve.
- Set activation date: Set the key’s activation date
- Set expiration date: Set the key’s expiration dateand other relevant settings as needed
- Click the “Create” button to create the key.
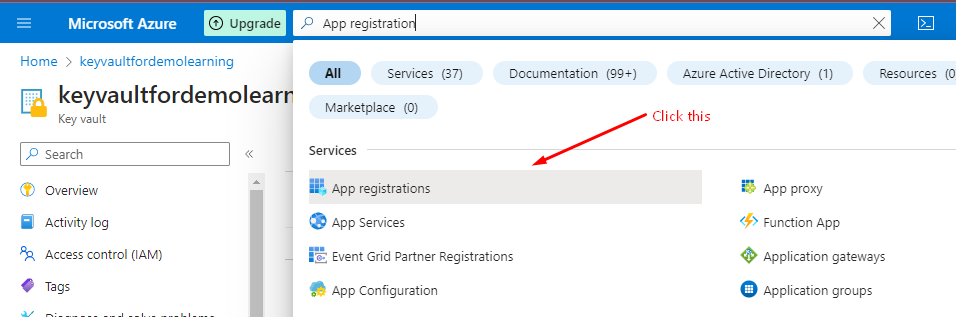
- Step 1: Start by searching for “App registration” in the search bar.
- Step 2: To complete the application registration process, provide the necessary additional information. After providing the details, click on the “Register” button to finalize the registration.
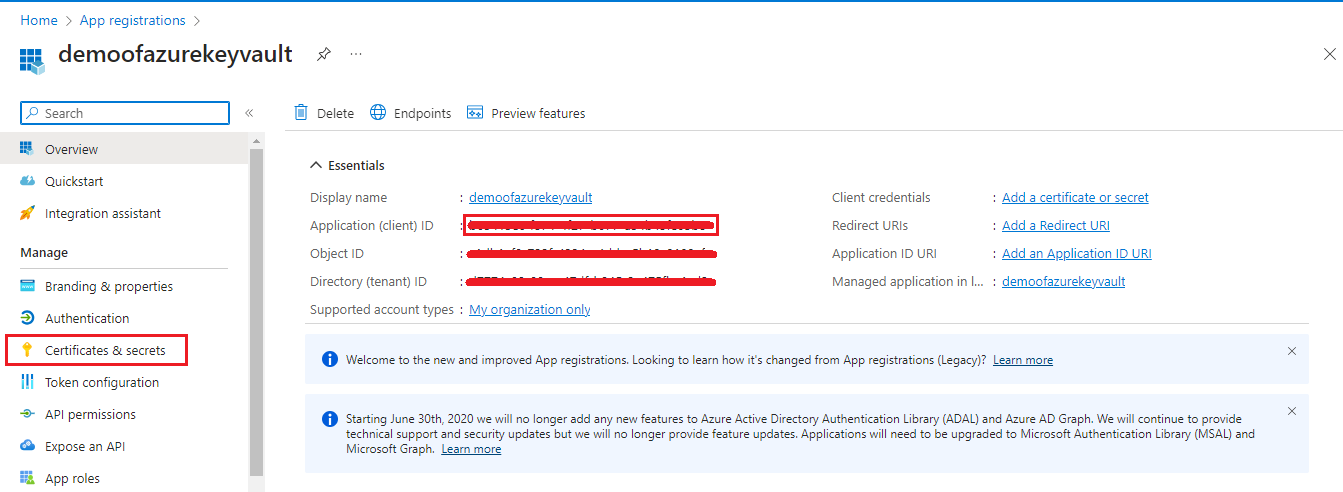
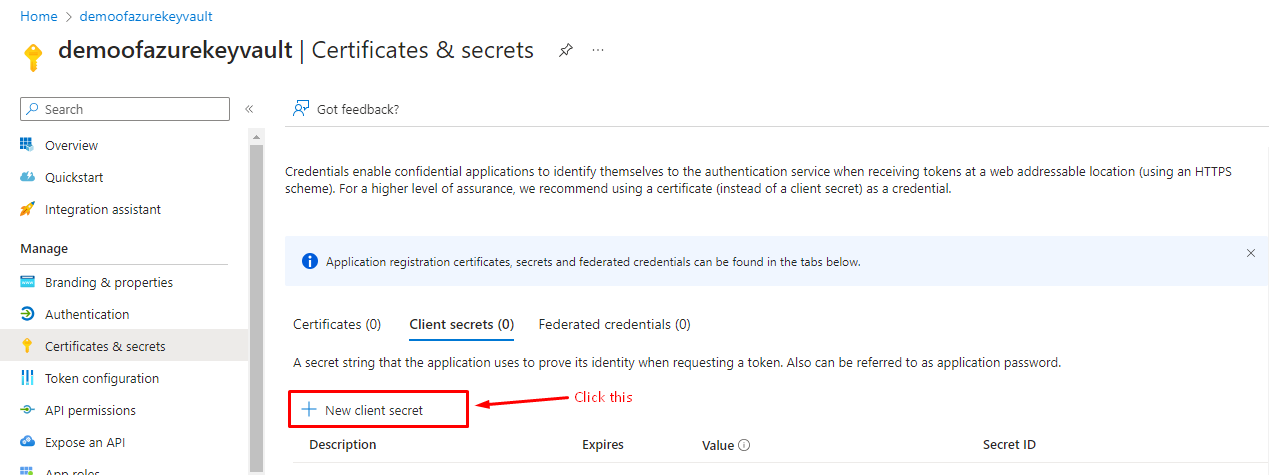
- Step 1: Navigate to “Certificates and Secrets” in the sidebar and click on it.
- Step 2: Next, select the “+” symbol, labeled “New client secret” to add a client secret.
- Step 3: On the “Add a Client Secret” page, provide a description (such as Secret name, etc.), choose an expiration duration from the dropdown menu, and then click the “Add” button to include the client secret.
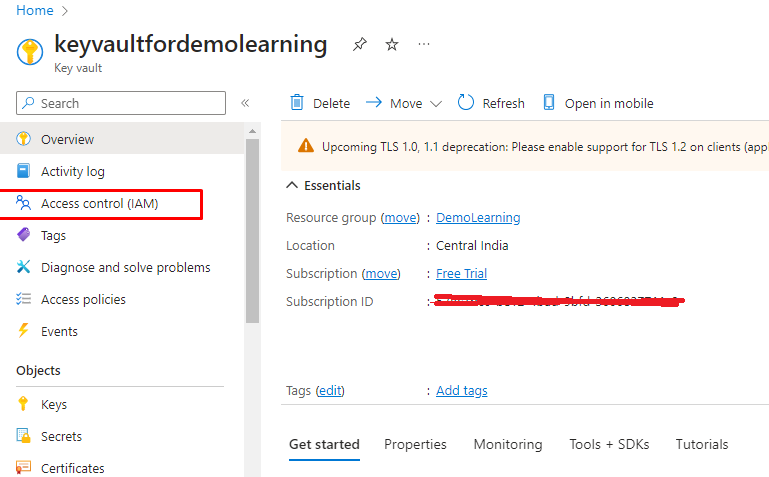
- Step 1: Navigate to the “Access Control (IAM)” section in the sidebar of the key vault.
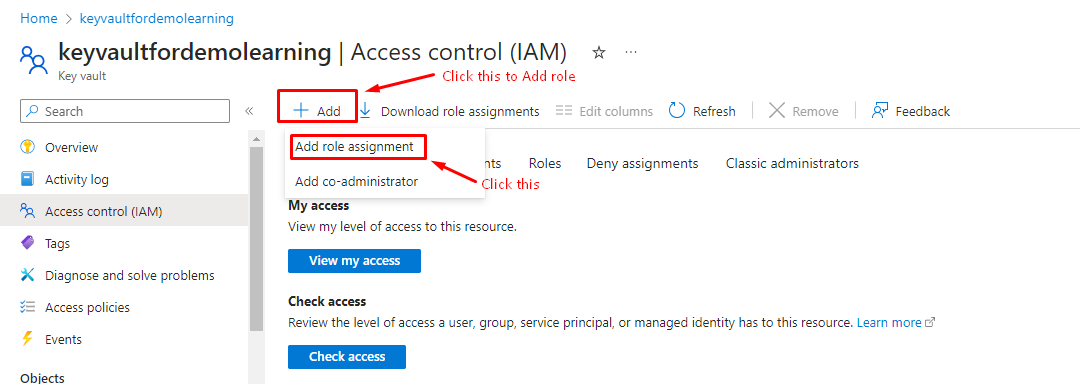
- Step 2: Then, select the “+” symbol labeled as “add” and proceed to “add role assignment.”
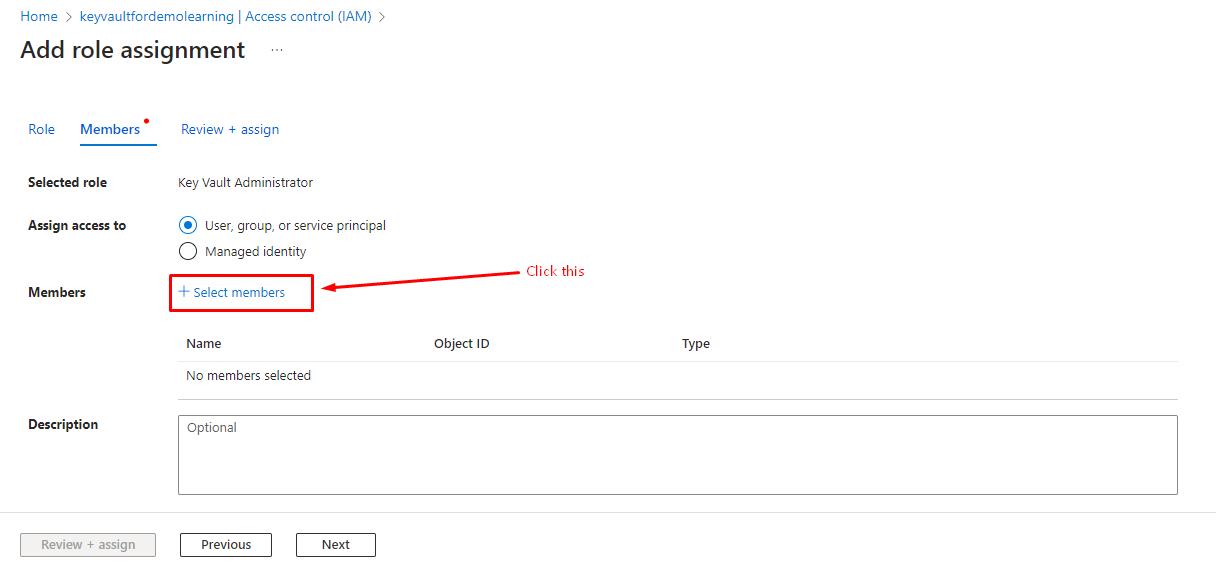
- Step 3: Choose “Key Vault Administrator” and then click on “Members.”
- Step 4: Select the desired members by clicking on “Select the members” and searching for them.
- Step 5: After selecting the members, click on the “Review + Assign” button to add the role.
- If you encounter the given exception:
“Caller is not authorized to perform action on resource.
If role assignments, deny assignments or role definitions were changed recently, please observe propagation time.- Here are the steps to address this issue:
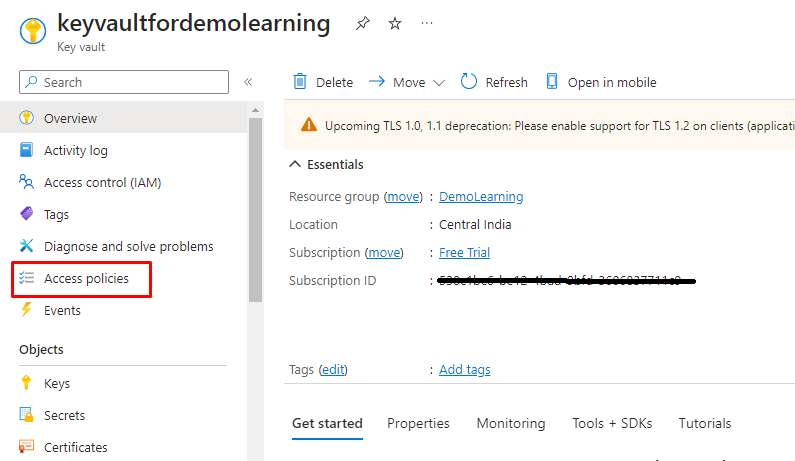
To resolve this exception, you can grant the necessary permissions to your Key Vault. There are two approaches to achieve this:- Access Policies: Open your Key Vault and navigate to the “Access policies” section. Add the required permissions for the specified action to the caller (YourAPP). Ensure that the specified Assignment is created correctly.
- Here are the steps to address this issue:
- Access Control (IAM): Alternatively, go to the “Access control (IAM)” section in your Azure Key Vault. Add the necessary role assignment to the caller’s identity (YourAPP) for the specific action mentioned . Confirm that the Assignment is properly configured.
- AzureKeyVaultURL: Your Azure key vault URL
- AzureClientTenantId: Your Azure AD tenant ID.
- AzureClientId: Your Azure AD client ID.
- AzureClientSecret: Your Azure AD client secret.
- KeyName: Your key name from the Azure portal.
- Run Project: After Running the project, You can clearly see the result:
Introduction to Azure Key Vault:
What is Azure Key Vault?
Azure Key Vault is a cloud service provided by Microsoft Azure that helps you securely manage keys, secrets, certificates, and other sensitive information used by your applications. It acts as a centralized repository for managing cryptographic assets and secrets in a secure and scalable manner.
Key Concepts
Why Use Azure Key Vault?
Creating a .NET Core Web API Project:
Setting up .NET Core 7 Web API Project
Please follow step for creating Web API Project:
Note: Please follow this link to learn how to create a new project:
Setup Keys In Azure Portal:
Firstly, setting up Azure Key Vault involves several steps, which can be outlined as follows. Azure Key Vault is a service that enables the secure management of keys, secrets, and certificates used by cloud applications and services.
Create an Azure Key Vault:
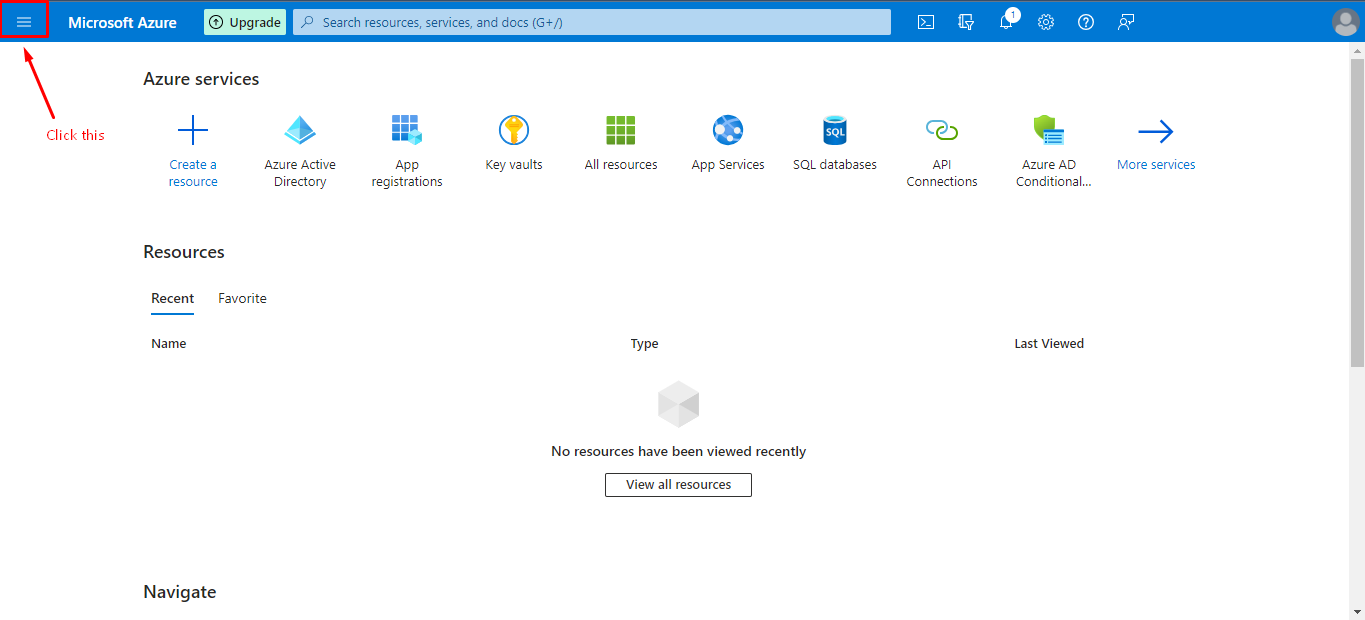
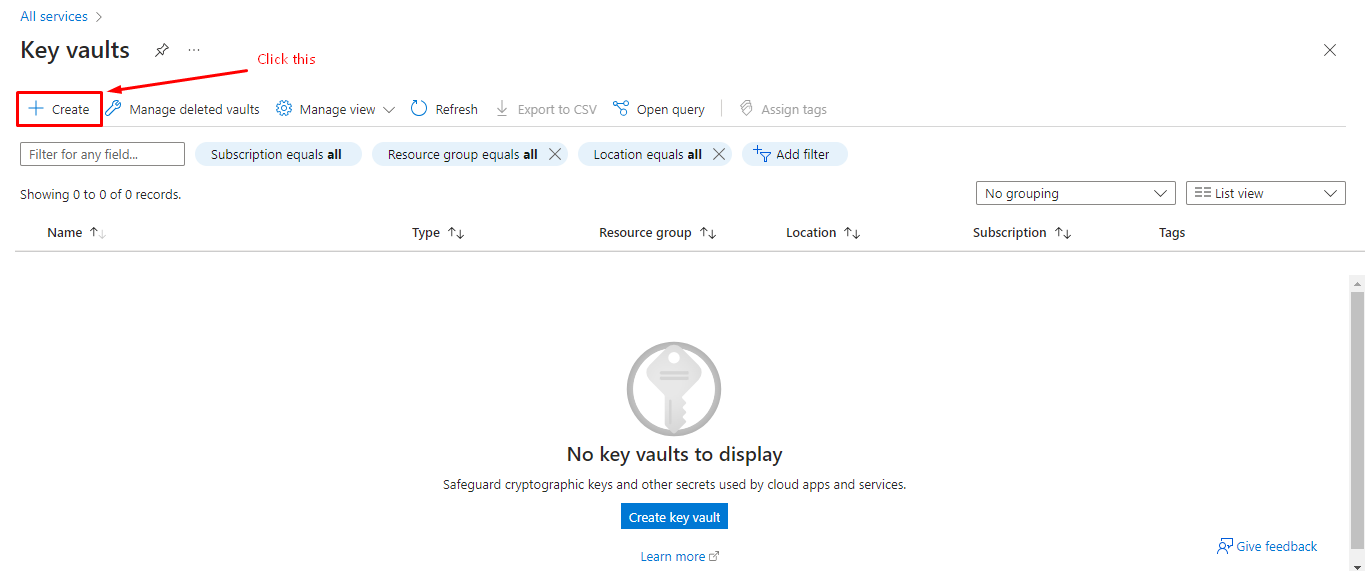
Click on “All Services”.
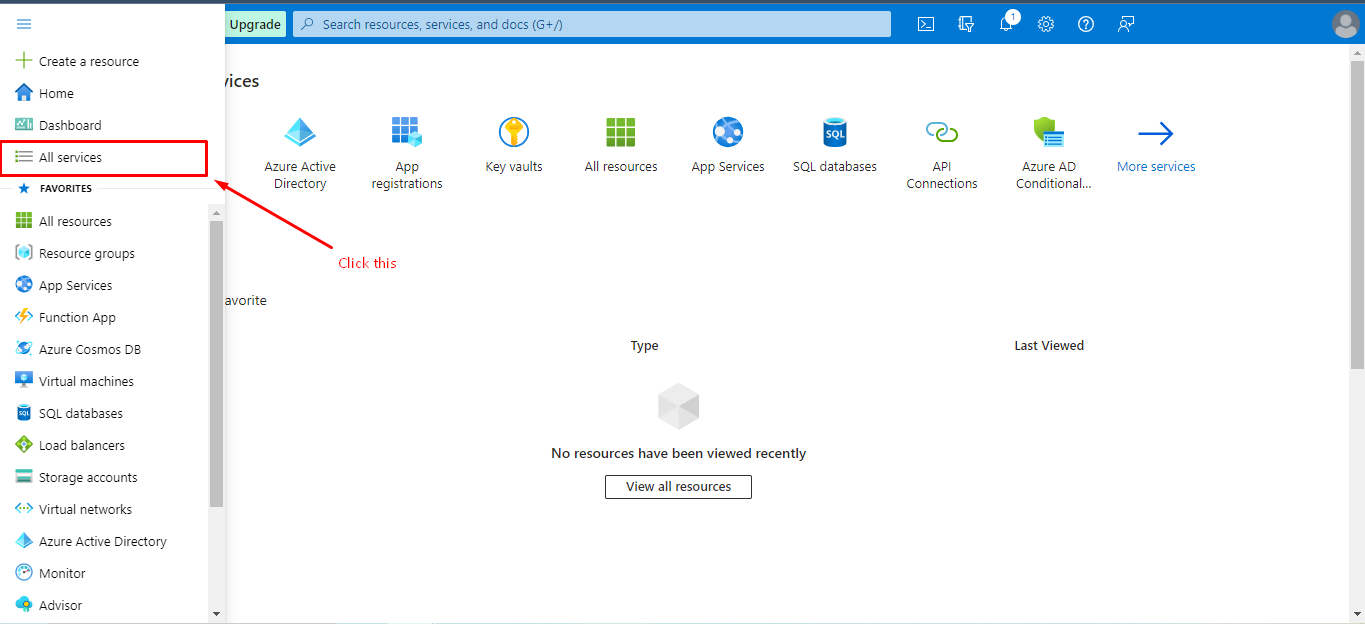
Now, navigate to the “All Services” section. Within this section, search and select “Key Vault.”

Step 4: Click on the “+” sign to initiate the creation of a new Key Vault.
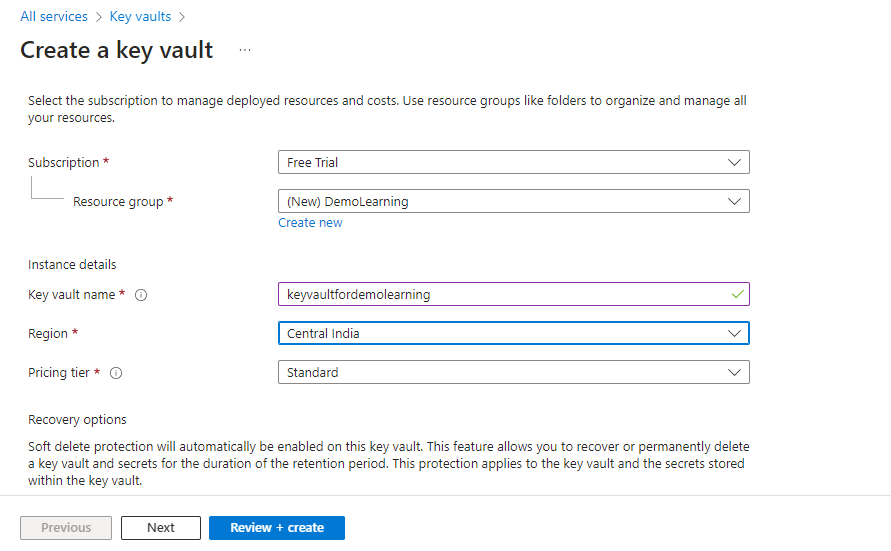
Step 5: In the creation process, select a subscription, specify a resource group, enter a name for the Key Vault, choose a region, and set the pricing tier. Afterward, scroll down the page.
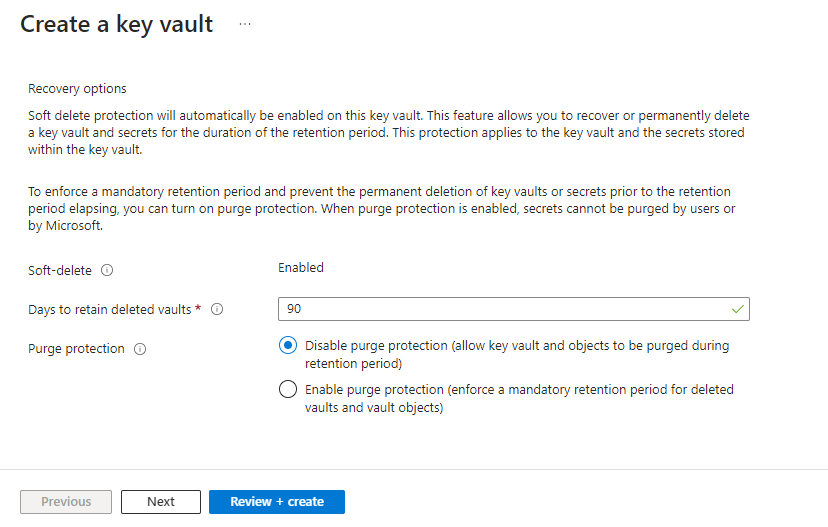
Step 6: In the recovery options, specify the number of days for retaining deleted vaults. Then, proceed by clicking on the “Next” button.
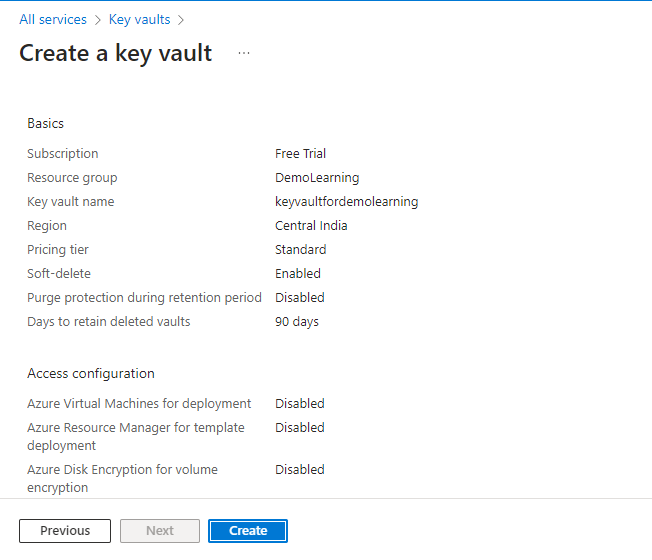
Step 7: After carefully reviewing all the provided details and ensuring they meet your requirements, proceed by clicking the “Create” button to complete the Key Vault creation process
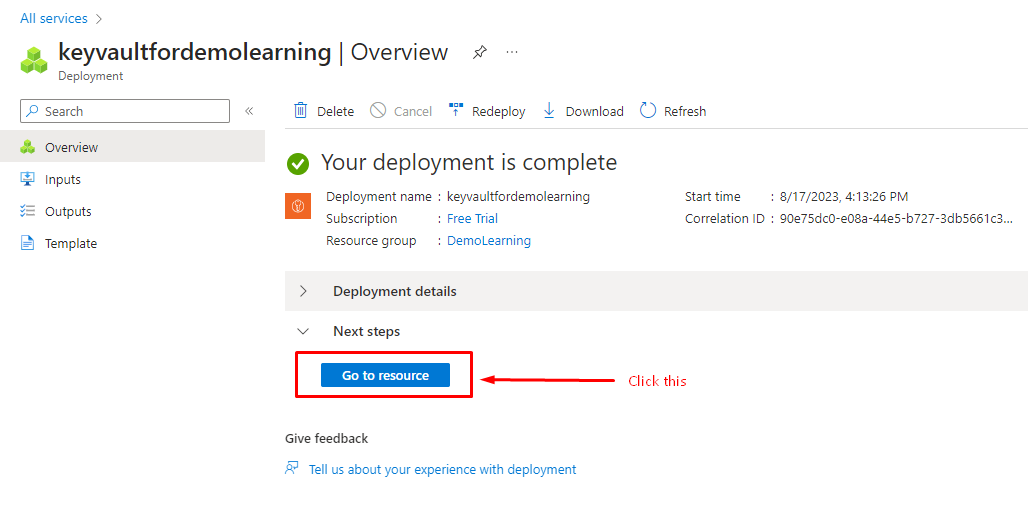
Go to the “Overview” section and click on “Go to resource.”
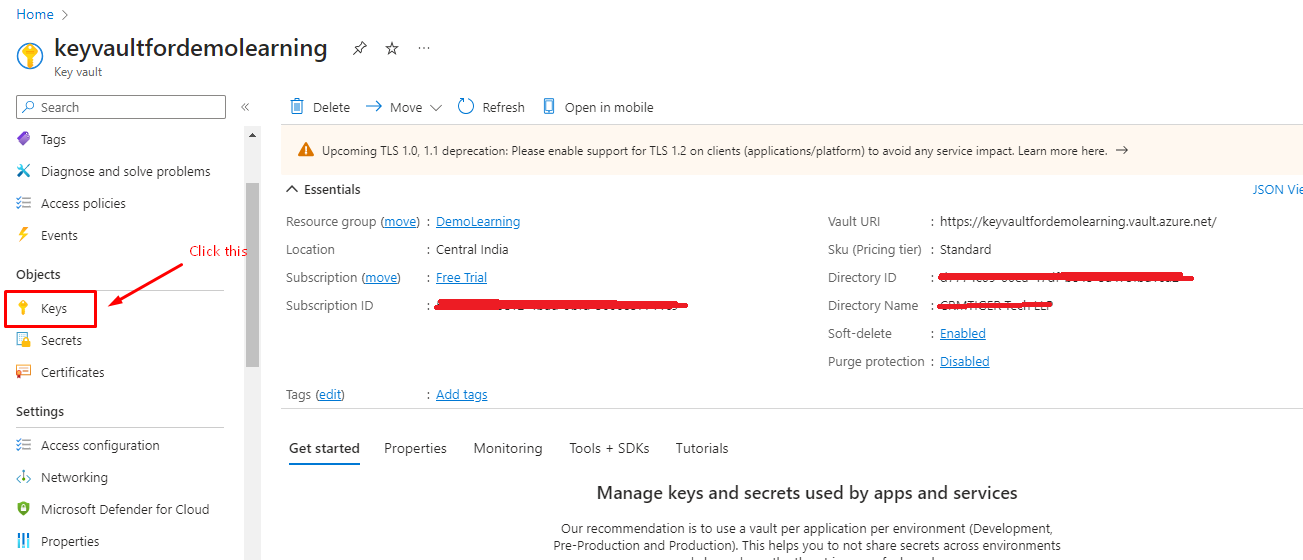
In this section, You can see Your Azure key vault URL and Directory ID.
Note: Directory ID is also called Tenant ID.

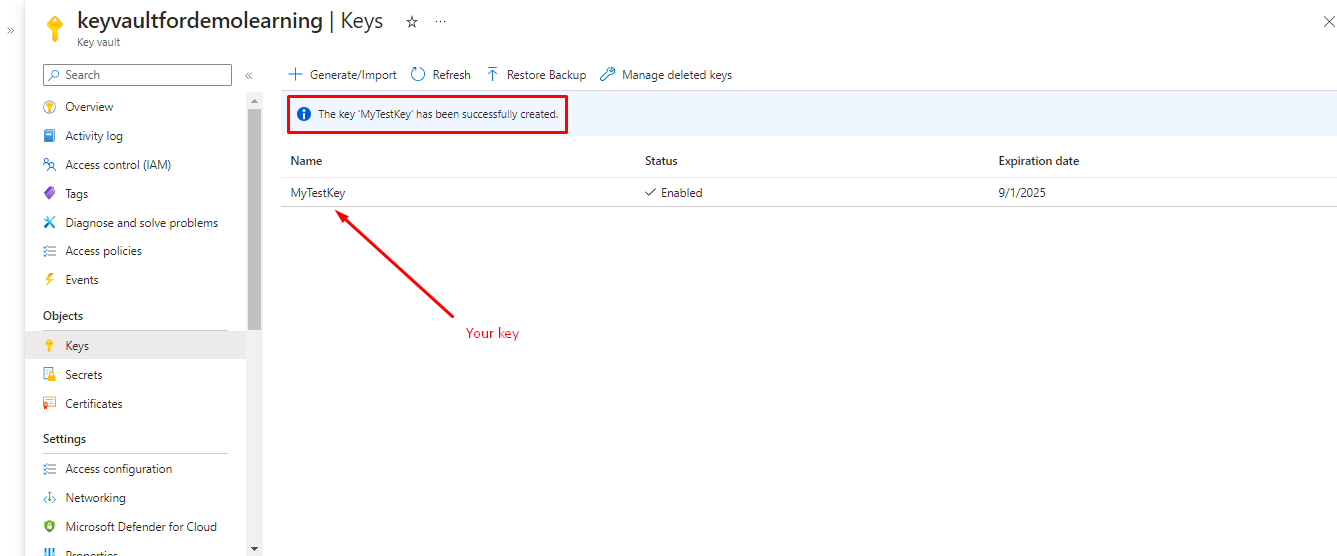
Add Keys In Key Vaults:
Now, You can see the message “The key MyTestKey has been successfully created” And your Key.
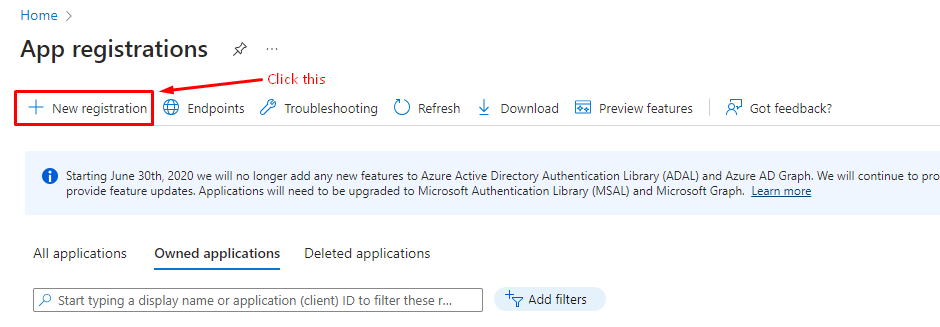
Register an App:
Select the “+” symbol, labeled “New registration” to create a new registration.
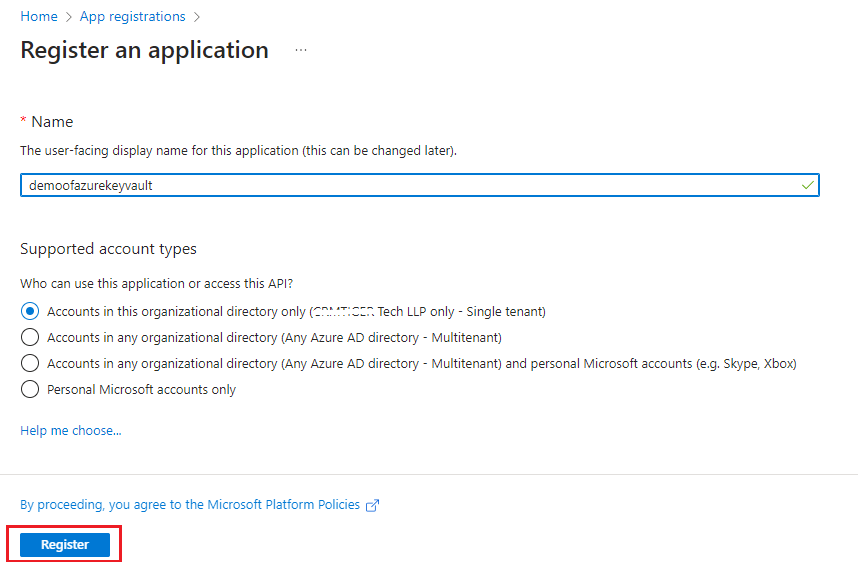
After Click on the Register button you will navigate to the below page.
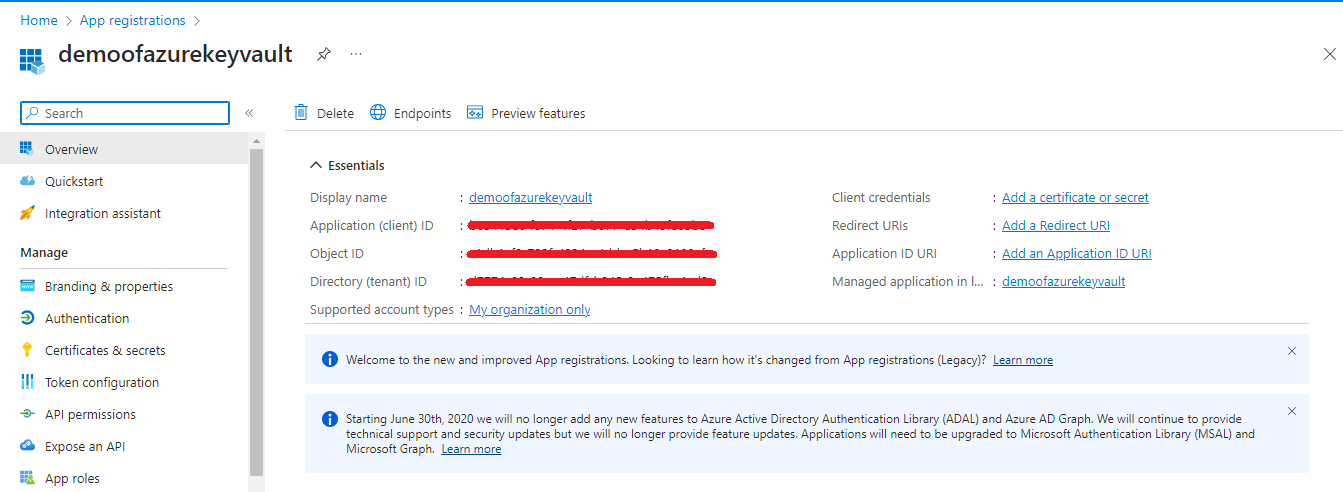
Retrieve Client ID, Client Secret, and Tenant ID:
In the Above picture Application (client) ID is your “AzureClientID” and Directory(tenant) ID is your “AzureTenantID“.
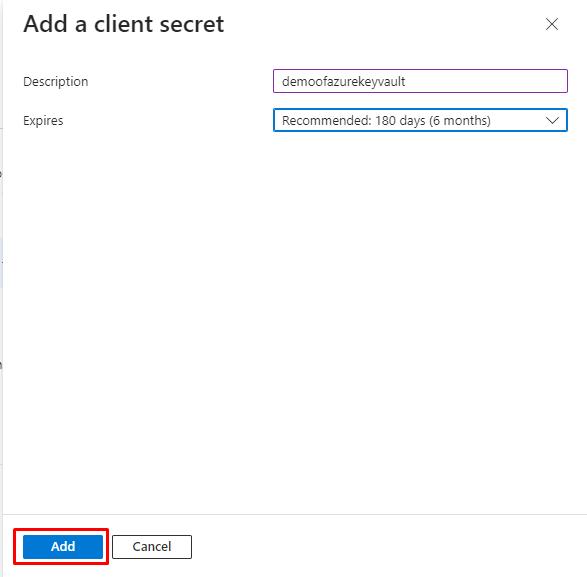
After Click on the Add button you will navigate to the below page.
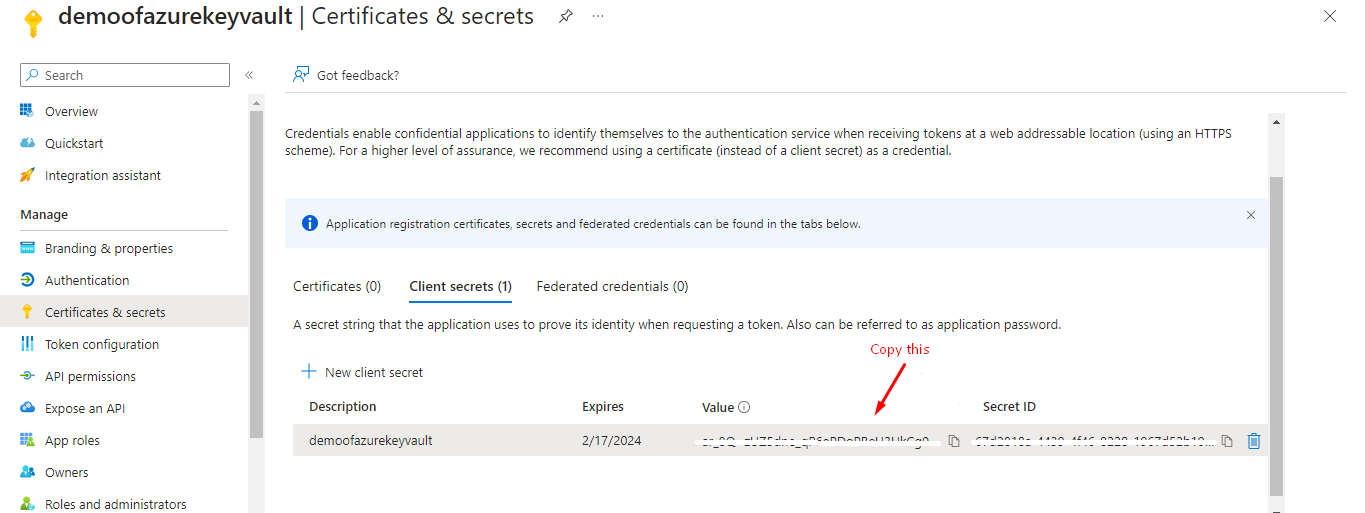
In Above Value is your “AzureClientSecret“
Note: Be sure to copy and save the client secret value, as it won’t be visible after you close this tab
Troubleshoot:

Note: If you getting the Above warning while creating a Keys then follow the below step

After Clicking on the Select member button you will see the member list like the below page.
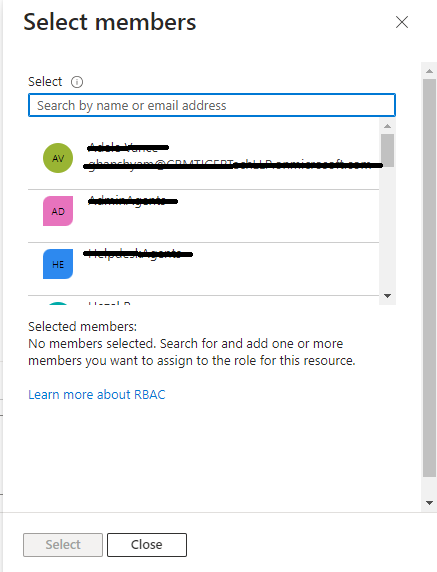


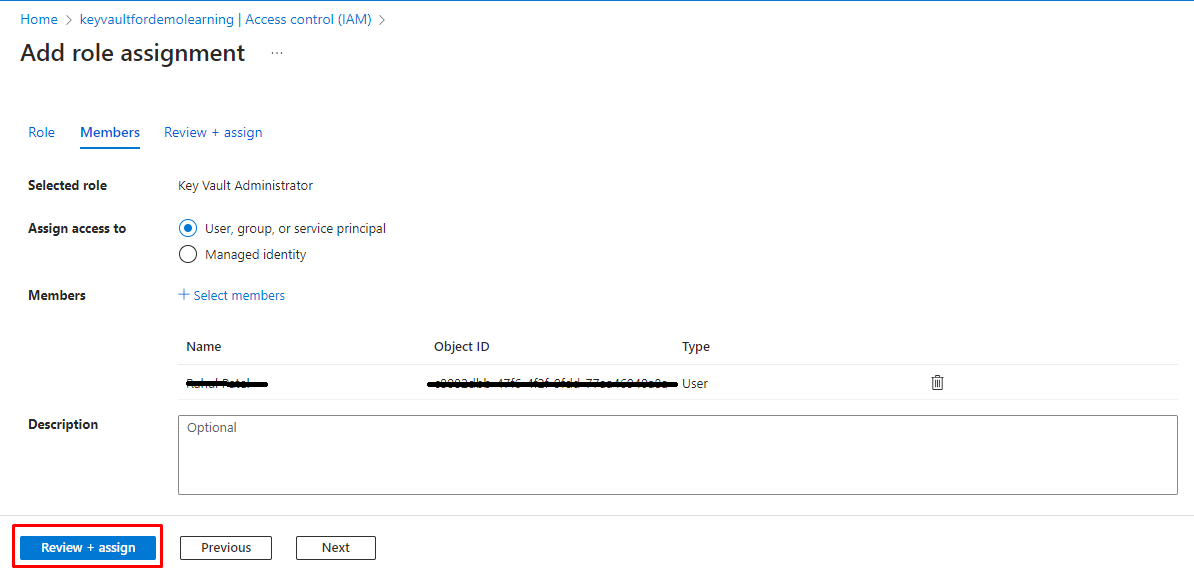
You can see the “Add Role Assignment” section.

In this Add Role Assignment section you can select Key Vault Administrator and click on Member button.

After Clicking on the Select member button you will see the member list like the below page.

In the above, search for your app by its name, and once located, select it
Configuring Azure Key Vault-Key Integration:
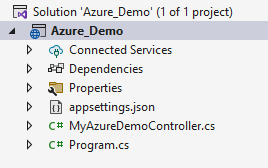
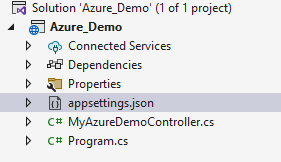
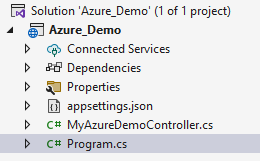
Our project structure look like this:
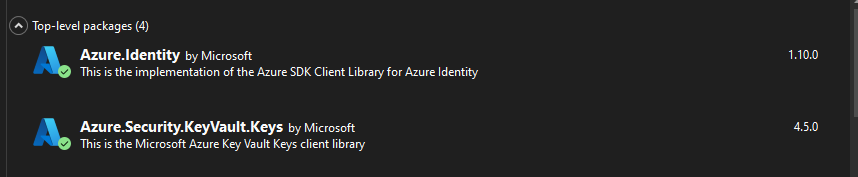
Installing the NuGet package
Need to add the Azure.Identity and Azure.Security.KeyVault.Keys NuGet package to your web API project.
Code Implementation:
Configure appsettings.Json: Set some environmental variables in Azure_Demo/appsettings.json file.
{
    "AzureKeyVault": {
        "AzureKeyVaultURL": "",
        "AzureClientId": "",
        "AzureClientSecret": "",
        "AzureClientTenantId": "",
        "KeyName": ""
    }
}
Add the following values with your actual Azure Key Vault and Azure AD application details:
Configure Key Vault Certificates Integration: In your Azure_Demo/Program.cs file, you need to configure the Azure Key Vault Configuration provider.
using Azure.Identity;
using Azure.Security.KeyVault.Keys;
using Azure.Security.KeyVault.Keys.Cryptography;
using System.Text;
class Program
{
static async Task Main(string[] args)
{
IConfigurationBuilder builder = new ConfigurationBuilder()
.SetBasePath(Directory.GetCurrentDirectory())
.AddJsonFile("appsettings.json");
IConfiguration configuration = builder.Build();
// Read the Azure Key Vault settings from appsettings.json
string keyVaultUrl = configuration["AzureKeyVault:AzureKeyVaultURL"];
string tenantId = configuration["AzureKeyVault:AzureClientTenantId"];
string clientId = configuration["AzureKeyVault:AzureClientId"];
string clientSecret = configuration["AzureKeyVault:AzureClientSecret"];
// Key name you want to access
string keyName = configuration["AzureKeyVault:KeyName"];
// Create a KeyClient instance using client secret authentication
var clientSecretCredential = new ClientSecretCredential(tenantId, clientId, clientSecret);
var keyClient = new KeyClient(new Uri(keyVaultUrl), clientSecretCredential);
// Retrieve the key from Key Vault
KeyVaultKey key = await keyClient.GetKeyAsync(keyName);
// Create a CryptographyClient for encryption and decryption
var cryptoClient = new CryptographyClient(key.Id, new ClientSecretCredential(tenantId, clientId, clientSecret));
// Message to encrypt and decrypt
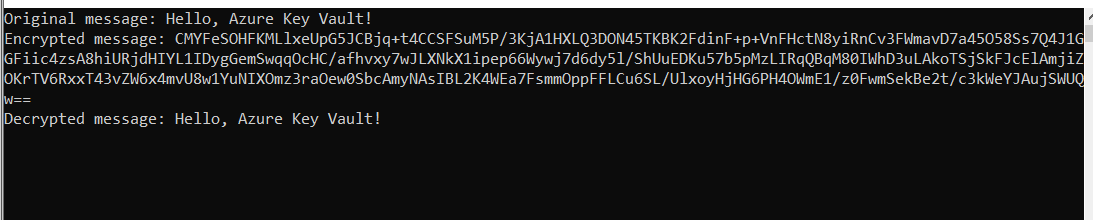
string messageToEncrypt = "Hello, Azure Key Vault!";
// Convert the message to bytes
byte[] messageBytes = Encoding.UTF8.GetBytes(messageToEncrypt);
// Encrypt the message using the key
EncryptResult encryptResult = await cryptoClient.EncryptAsync(EncryptionAlgorithm.RsaOaep, messageBytes);
// Decrypt the encrypted message using the key
DecryptResult decryptResult = await cryptoClient.DecryptAsync(EncryptionAlgorithm.RsaOaep, encryptResult.Ciphertext);
// Convert the decrypted bytes back to a string
string decryptedMessage = Encoding.UTF8.GetString(decryptResult.Plaintext);
// Display the results
Console.WriteLine("Original message: " + messageToEncrypt);
Console.WriteLine("Encrypted message: " + Convert.ToBase64String(encryptResult.Ciphertext));
Console.WriteLine("Decrypted message: " + decryptedMessage);
Console.ReadLine();
}
}This code demonstrates how to securely store cryptographic keys in Azure Key Vault and use them for encryption and decryption operations, ensuring the confidentiality and integrity of your data. It uses Azure AD for authentication and authorization to access the Key Vault.
Do You Need more information?
For any further information / query regarding Technology, please email us at info@varianceinfotech.in
OR call us on +1 630 534 0223 / +91-7016851729, Alternately you can request for information by filling up Contact Us
Chirag Darji
Chirag is a Business strategist, helping Variance Infotech to spread their expertise in Dotnet development & CRM solutions for all industries among businesses which has been proven a Boost-up factor in the digital aura worldwide.
 Please wait...
Leave a Reply